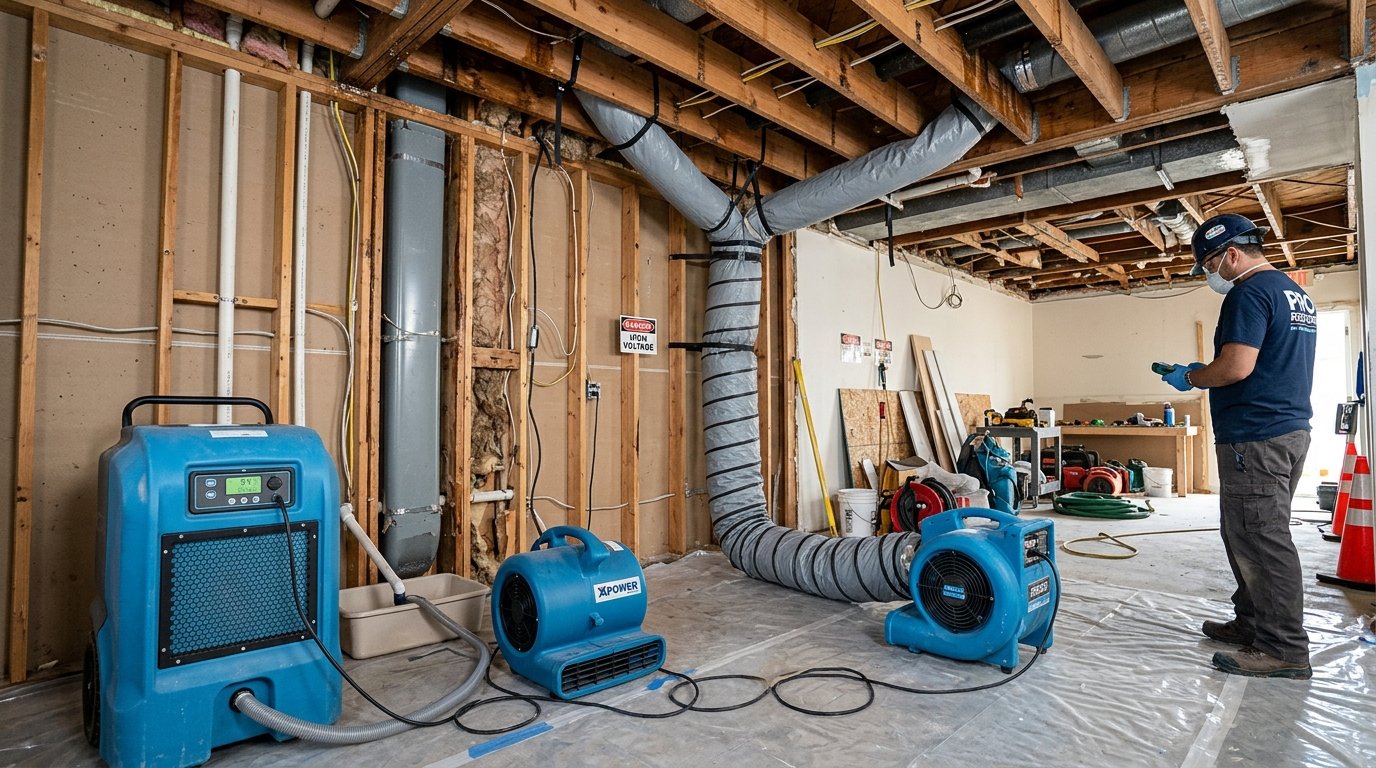
A water-stained, bubbling, or sagging ceiling is an urgent warning sign of hidden overhead moisture. Learn how to pinpoint the source — plumbing, AC condensate, or roof — relieve hydraulic weight safely, and execute scientific IICRC S500 structural dry-out before mold or ceiling collapse occurs.
Last updated:Reading time:15 minStandards:IICRC S500 Verified
Ceiling Water Damage: Causes, Signs, and What to Do · Thermal Moisture Diagnostics · Phoenix Metro
Table of contents▾
Ceiling water damage is rarely an isolated cosmetic issue — it is the visible exit point of water that has already traveled across upper floors, attic insulation, and structural framing. The immediate priority is safety and stabilization: relieve pooled water weight through a controlled pinhole puncture into a bucket to prevent catastrophic drywall collapse, cut electrical power to wet ceiling fixtures, and isolate the source. Professional drying requires infrared thermal mapping and commercial Low-Grain Refrigerant (LGR) dehumidification to dry framing to below 12% Wood Moisture Equivalent (WME) before mold germinates.
What to Do Right Now: The 5-Step Emergency Triage
If you are currently looking at water actively dripping, dripping through light fixtures, or ballooning behind latex ceiling paint, follow this immediate action protocol:
1
Relieve Hydraulic Pressure (The Pinhole Trick)
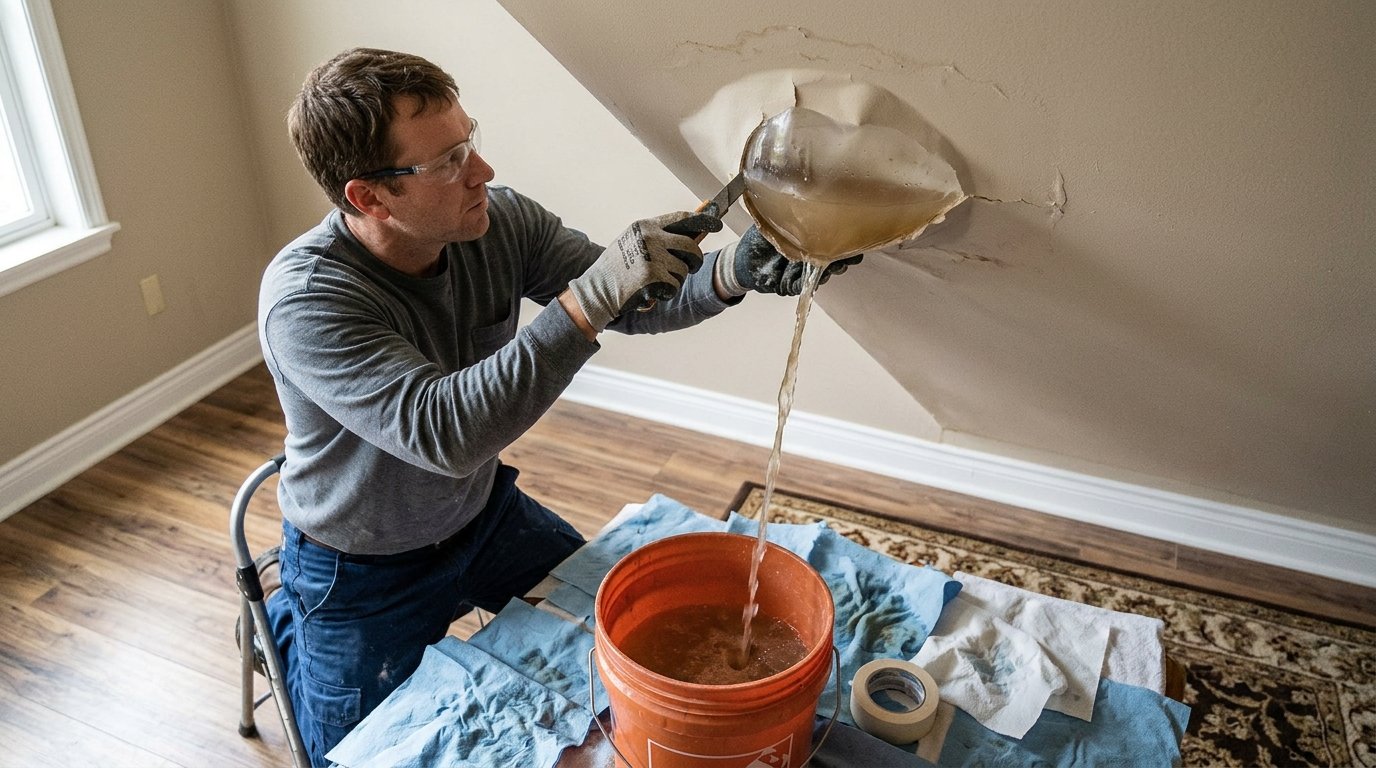
Drywall loses its structural integrity when saturated. If water is pooling behind paint or sagging in a drywall belly, place a bucket underneath and puncture a clean hole in the center of the bulge with a screwdriver or nail. This channels the trapped water in a controlled stream into your container, preventing a sudden, destructive ceiling collapse.
2
Cut Power to the Affected Circuit
Water naturally follows ceiling wiring and pools inside recessed lighting cans, smoke detectors, and ceiling fan motor housings. With dry hands and dry footing, go to your main electrical panel and switch off the breaker supplying power to that room. Do not touch damp light switches.
3
Shut Off the Water Source
If an upstairs toilet, sink, or shower is running, shut off the local angle stop valve. If the leak is pressurized and continuous, shut off the home's main water shutoff valve. If it is hot and your air conditioner is running, turn the thermostat to "OFF" immediately.
4
Protect Floors and Personal Property
Move furniture, electronics, and valuables away from the ceiling drop zone. Cover luxury vinyl plank, hardwood, or carpet with plastic sheeting or towels to prevent moisture from creating secondary subfloor or flooring failure.
5
Call 24/7 Professional Restoration
Call our 24/7 emergency water damage response team for infrared thermal moisture mapping, wet insulation extraction, and industrial cavity drying before structural mold colonies form.
Emergency Triage / Water BlisterPinhole drainage triage relieves heavy hydraulic water weight before saturated drywall breaks loose from ceiling joists and collapses into the room.
The 7 Clear Signs of Ceiling Water Damage
Water damage does not always announce itself with a torrential downpour. Often, a slow, hidden leak develops over weeks before breaking through. Watch for these seven critical warning signs:
1Discolored Stains & Rings
Yellow, copper, or dark brown circular stains on drywall or acoustic plaster. The ring pattern forms as water migrates outward and dries repeatedly. Read our guide on how to tell if a ceiling stain is new or old damage.
2Bubbling, Peeling, or Blistering Paint
Latex paint creates a flexible, waterproof skin. When water enters from above, paint stretches like a water balloon rather than letting moisture pass through.
3Sagging, Bowed, or Pillowing Drywall
Gypsum drywall turns to heavy, crumbly paste when saturated. The core loses cohesion and sags between ceiling joists, pulling through screw heads.
4Cracking Along Drywall Seams
Straight-line cracks appearing along 4x8 drywall sheet joints. Saturated joint compound (mud) softens and paper drywall tape delaminates.
5Damp or Dislodged Ceiling Textures
Popcorn acoustic texture, skip-trowel, or orange peel finishes flaking off, turning spongy, or falling to the floor when touched.
6Musty, Earthy Odors
A persistent damp or locker-room smell emanating from ceiling vents, light fixtures, or corners — the hallmark of microbial spore amplification in the attic.
7Visible Dark Mold Growth (Black, Green, or Powdery Spores)
Speckled black, olive-green, or grayish fuzzy colonies appearing along ceiling edges, corners, or around AC supply registers. This indicates moisture has been present for more than 48 hours and requires containment-based mold remediation.
What Causes Ceiling Water Damage? (Diagnosing the Source)
Ceiling water damage in Arizona homes generally originates from one of three primary sources: overhead plumbing, attic HVAC systems, or roof storm breaches. Understanding the differences ensures you fix the root cause before rebuilding.
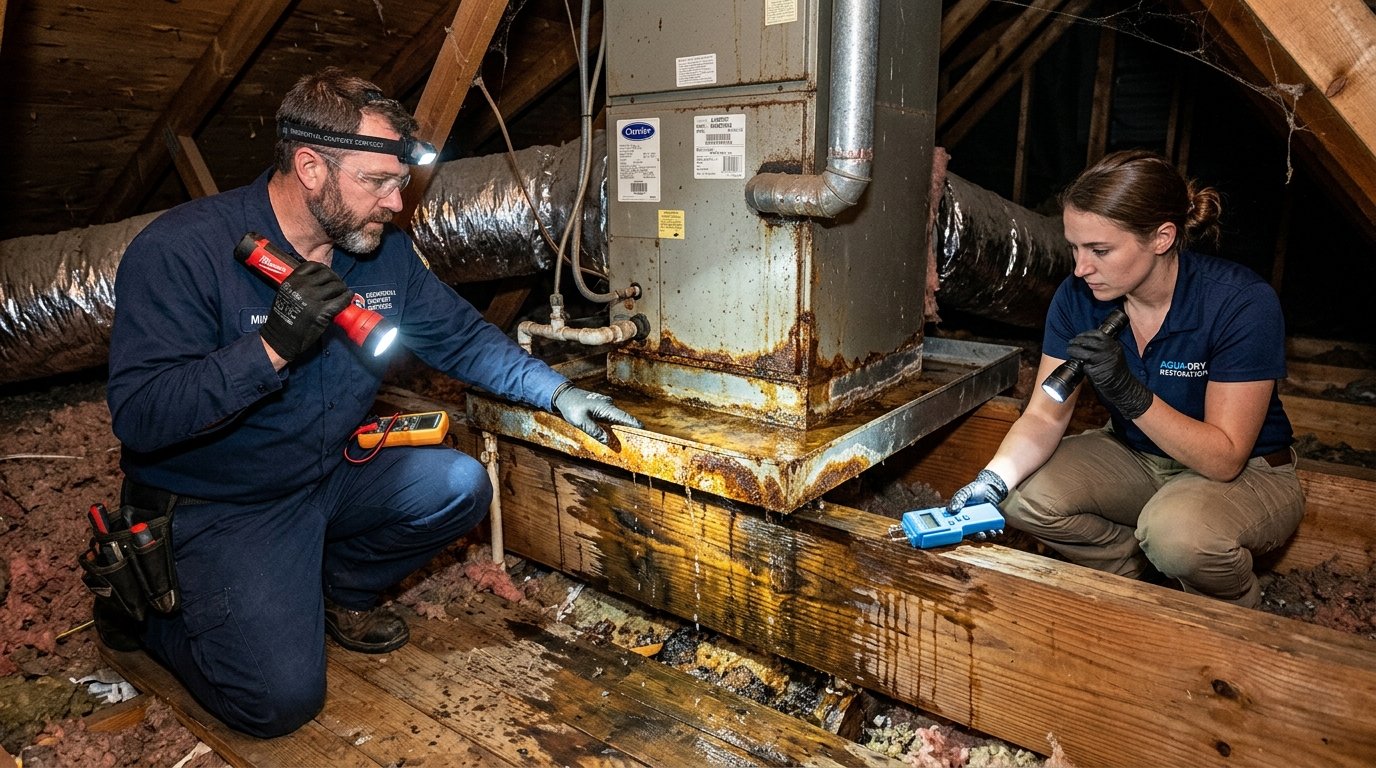
Source Diagnostics / Attic HVACClogged condensate lines and rusted secondary drain pans in attic air handler units are the #1 cause of sudden summer ceiling collapses in Phoenix homes.
1. Attic HVAC & AC Condensate Line Overflows (Arizona Summer #1 Culprit)
In Phoenix, Scottsdale, Mesa, and Chandler, air handlers are almost always installed directly in the attic space. During 115°F summer heatwaves, an AC unit running constantly extracts 15 to 25 gallons of water vapor out of the air daily.
Algae, dust, and microbial sludge frequently clog the 3/4-inch PVC primary condensate drain line. If the secondary drain line is blocked or the emergency float safety switch fails, the metal drain pan overflows directly into the attic floor. Hundreds of gallons of water soak through insulation and flood the ceiling below within hours.
2. Upstairs Bathroom & Plumbing Failures
In two-story homes in Gilbert, Peoria, Surprise, and Goodyear, upstairs bathrooms sit directly above living rooms, dining rooms, and kitchens. Common plumbing failures include:
Failed Toilet Wax Rings: Every flush pushes contaminated Category 2 or 3 water under the subfloor, rotting the wood and staining the ceiling below.
Cracked Shower Pans & Failed Grout: Water slowly seeps through tiled shower floors during every shower, creating a chronic, expanding water ring on the ceiling.
Burst Braided Supply Lines: High municipal water pressure (often 80–100+ PSI in newer Valley subdivisions) causes flexible stainless steel washer and sink lines to rupture, sending gallons per minute cascading through floor joists.
Tub Overflows: Bathtubs accidentally left running or clogged overflow gaskets that leak directly behind wall cavities.
3. Roof Leaks & Monsoon Storm Intrusion
Arizona's severe monsoon season brings microburst winds exceeding 60 MPH and torrential downpours. Failure points include:
Degraded Tile Underlayment: Intense UV radiation dry-rots 30# asphalt felt beneath concrete tiles in 12–18 years, allowing wind-driven rain to reach the roof decking.
Parapet Scupper Clogs on Flat Roofs: Dust and leaves block roof drains, causing 4 to 6 inches of standing ponding water to penetrate flashing seams.
Evaporative Cooler & Skylight Flashing: Deteriorated caulking and elastomeric seals around rooftop duct chases and skylights.
Stop using upstairs bathroom immediately; sanitize with botanical antimicrobial
Roof Storm Intrusion
Occurs during/immediately following rain, high wind, or monsoon storms
Category 2 to 3 (Rainwater mixing with attic bird/rodent droppings)
Deploy emergency roof tarping; inspect tile laps and parapet scuppers
Diagnostic Matrix: Identifying Ceiling Water Damage Origins by Pattern and Category
Structural Mitigation / Cavity DryingIndustrial LGR dehumidifiers and directional air movers force dry, heated air into ceiling cavities, bringing moisture content down to verified equilibrium standards.
How Professionals Restore Ceiling Water Damage (IICRC S500)
Restoring ceiling water damage is an engineering science. Household fans and open windows cannot evaporate moisture trapped deep inside wood joists or behind double-layered drywall. Our technicians follow the certified IICRC S500 restoration protocol:
1. Infrared Thermal Imaging & Calibrated Mapping
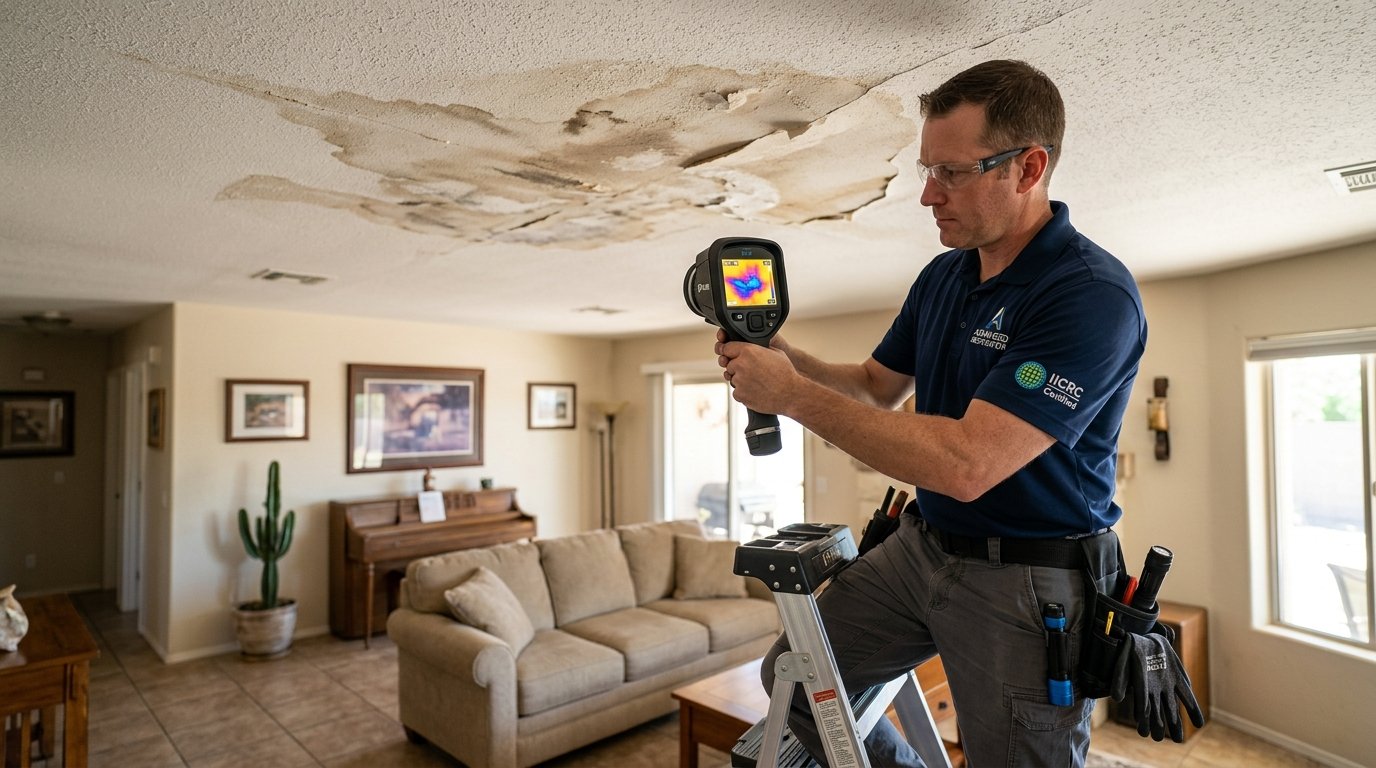
Using FLIR thermal cameras and non-penetrating radio frequency moisture meters, technicians map the entire migration boundary. Water spreads horizontally along floor joists and plumbing chases, so the true wet perimeter is often 2 to 3 times larger than the visible stain.
2. Containment Chamber & HEPA 500 Air Scrubbing
If water is Category 2 or 3, or if mold spores have begun germinating, technicians erect floor-to-ceiling plastic containment walls with zipper entry points. Commercial HEPA air scrubbers establish negative air pressure, capturing 99.97% of airborne dust, fiberglass, and fungal spores so they never contaminate the rest of your home.
3. Attic Saturated Insulation Extraction
Saturated blown-in cellulose or fiberglass insulation above the ceiling is vacuum-extracted through heavy-duty industrial hoses directly to external disposal bins. Removing the wet sponge allows air to circulate around structural trusses.
4. Industrial LGR Dehumidification & Air Movers
Commercial Low-Grain Refrigerant (LGR) dehumidifiers lower the ambient humidity and grain depression in the drying chamber. High-velocity axial air movers are positioned to create a high-speed vortex of dry air across ceiling joists, pulling bound water out of wood cells through vapor pressure differentials.
5. Daily Psychrometric Monitoring & Clearance
Every 24 hours, technicians log relative humidity, GPP, and wood moisture content. Once structural framing tests below 12% WME across three consecutive readings, the equipment is demobilized and a certified dry standard report is issued.
Ceiling Water Damage Repair Costs & Timelines (2026 Arizona)
We provide upfront itemized written estimates with zero surprise demolition fees. Here is what homeowners typically budget for ceiling water damage restoration in the Phoenix metro:
Restoration & Rebuild Scope
Average Cost (Phoenix Metro)
Estimated Timeframe
Emergency Water Extraction & Containment
$500 – $1,500
1 – 3 hours (Immediate dispatch)
Structural Cavity Drying (LGR + Air Movers)
$1,200 – $3,800
3 – 5 days continuous run
Attic Wet Insulation Vacuum Extraction & Re-Blow
$900 – $2,400
1 day
Antimicrobial Sanitization & Mold Remediation
$600 – $4,500
1 – 2 days
Drywall Replacement, Texture Match & Painting
$450 – $2,200
2 – 4 days (after drying clearance)
Full Turnkey Project Total
$1,600 – $6,500
5 – 10 days total turnaround
2026 Ceiling Water Damage Cost Breakdown for Arizona Homes
"If the drip stopped, the problem is gone and it will dry naturally."
Trapped water inside ceiling drywall, insulation, and joists remains wet for weeks in dark cavities, creating a prime breeding ground for toxic mold.
"Kilz or stain-blocking primer will permanently fix the ceiling stain."
Applying primer over damp drywall traps water inside the gypsum core, causing drywall rot, paint blistering, and mold bloom behind the sealed layer.
"Bleach sprayed on a moldy ceiling kills all the spores."
Bleach cannot penetrate porous drywall and adds moisture to the gypsum. IICRC remediation uses EPA-registered botanical biocides and mechanical HEPA vacuuming.
"Placing standard house fans in the room will dry the ceiling."
Household box fans only move humid ambient air around without removing water vapor. Industrial LGR dehumidifiers are required to extract moisture from the structure.
Ceiling Water Damage Myths vs. Scientific Facts
24/7 Valley-Wide Emergency Dispatch for Ceiling Leaks
Whether your ceiling water damage is caused by a midnight pipe burst, an attic AC overflow in the middle of a summer heatwave, or a severe monsoon roof breach, our certified restoration crews are staged across the Valley for rapid 30- to 45-minute arrival:
What should I do immediately if I see water dripping or bubbling from my ceiling?
Immediately contain the water: place a bucket underneath, move furniture and rugs away, and relieve the trapped water weight by piercing a small hole in the center of the sagging drywall blister with a screwdriver. Turn off the circuit breaker powering light fixtures in that room, and shut off the suspected water source (plumbing shut-off valve, HVAC unit, or call for emergency roof tarping).
How can I tell if a ceiling leak is caused by a roof, plumbing, or AC unit?
Timing and location provide the biggest clues. If the leak occurs during or immediately after rain, it is likely a roof breach or parapet scupper overflow. If the leak is constant regardless of weather, it is typically a pressurized plumbing supply line. If it occurs only when someone showers, runs a bath, or flushes an upstairs toilet, it is a drain or wax ring failure. If it occurs during hot summer afternoons when the cooling is running non-stop, it is usually a clogged AC condensate line or overflowing drain pan in the attic.
Is a water-damaged ceiling dangerous?
Yes, in three major ways: (1) Heavy water saturation weakens drywall and fasteners, causing sudden ceiling collapses that can weigh 50 to 150 lbs; (2) Water contacting energized ceiling fan and light wiring creates severe shock and fire hazards; (3) Warm Arizona attics cause mold spores to colonize damp drywall paper and insulation within 24 to 48 hours.
Never paint over an active or unverified water stain. Paint only hides the cosmetic surface while trapped moisture behind the drywall continues to rot ceiling joists, delaminate drywall gypsum cores, and foster hidden mold growth. A technician must verify that the framing is below 12% Wood Moisture Equivalent (WME) using calibrated moisture meters before applying stain-blocking primer.
How much does ceiling water damage repair cost in Arizona?
Cost depends on the scope: emergency water extraction and containment runs $500 to $1,500; structural cavity drying with commercial LGR dehumidifiers runs $1,200 to $3,800; wet attic insulation vacuum removal and replacement runs $900 to $2,400; drywall patching, texture matching, and painting runs $450 to $2,200. Total projects typically range from $1,600 to $6,500.
Does ceiling drywall always have to be replaced after a leak?
Not always. If the water was clean (Category 1), caught within hours, and the drywall has not sagged or softened, it can often be dried in place using high-velocity directional air movers and dehumidifiers. However, if the drywall is sagging, saturated with contaminated water (Category 2 or 3), or has developed microbial growth, the IICRC S500 standard requires controlled excision and replacement.
Does homeowners insurance cover ceiling water damage?
Yes, standard homeowner insurance policies generally cover sudden and accidental water damage (e.g., burst upstairs pipe, accidental tub overflow, or storm wind damage lifting roof tiles). Policies generally exclude gradual leaks caused by neglected maintenance (e.g., long-term slow shower grout leaks or worn-out roof underlayment). We provide comprehensive infrared moisture reports to document the sudden origin for your adjuster.
How long does it take to dry out a water-damaged ceiling?
Under industrial IICRC S500 drying protocols with commercial Low-Grain Refrigerant (LGR) dehumidifiers and cavity drying equipment, a ceiling cavity and wood truss framing typically dry to verified regional standards in 3 to 5 days. Daily moisture readings track the drying progress.
IICRC-certified restoration technicians · Phoenix metro
Written and fact-checked by the licensed crew that runs the trucks — the same technicians who take moisture readings, set drying chambers to the IICRC S500 standard, and answer the phone at 2 a.m. across the Phoenix metro.
Licensed Arizona contractor — AZ ROC #331127 (KB-2)